
I started penning this guide a while ago, but due to recent popular requests, I finally finished it! This is a complete guide on how to post your Doberman puppy’s ears, zip-tie method. Expect to spend approximately $50 for materials, which will last throughout the duration of the posting phase.
Introduction to Ear Posting
If you brought home a Doberman puppy with cropped ears, it is important to have its ears routinely cleaned, disinfected and re-posted on a weekly manner until they can stand on their own. Failure to do so may result in a kinked ear, floppy cropped ear or an infected ear.
There are many ear posting methods, some work better for long, show crops, while other method work better for short crop. For this guide, we will be using the zip-tie method for medium ear crops.
Materials Required
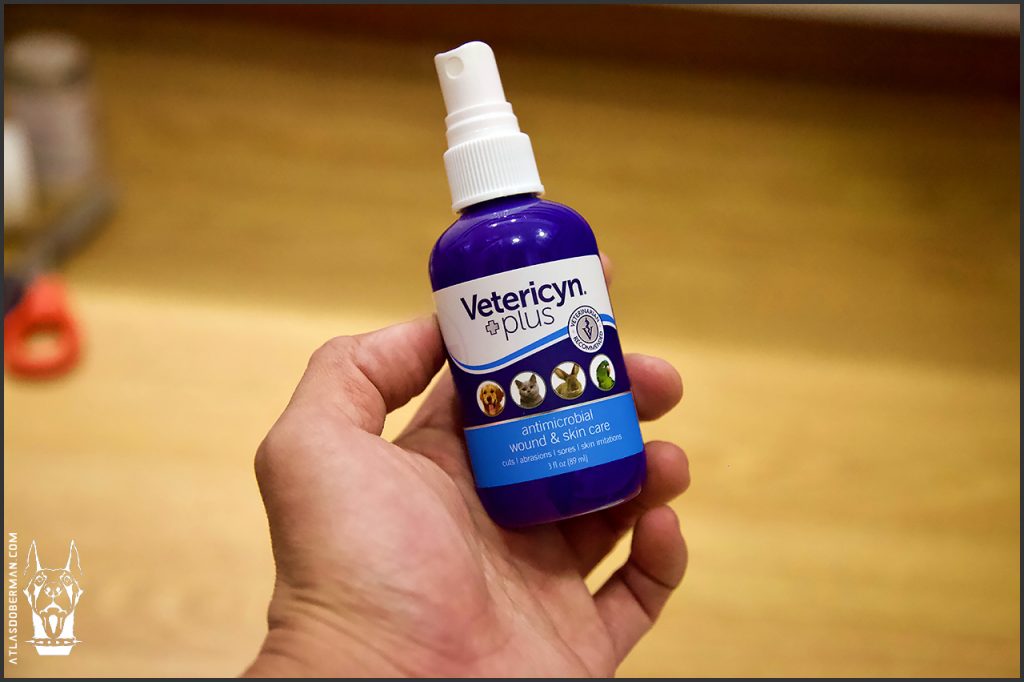
- Vetericyn+
- Isopropyl Alcohol
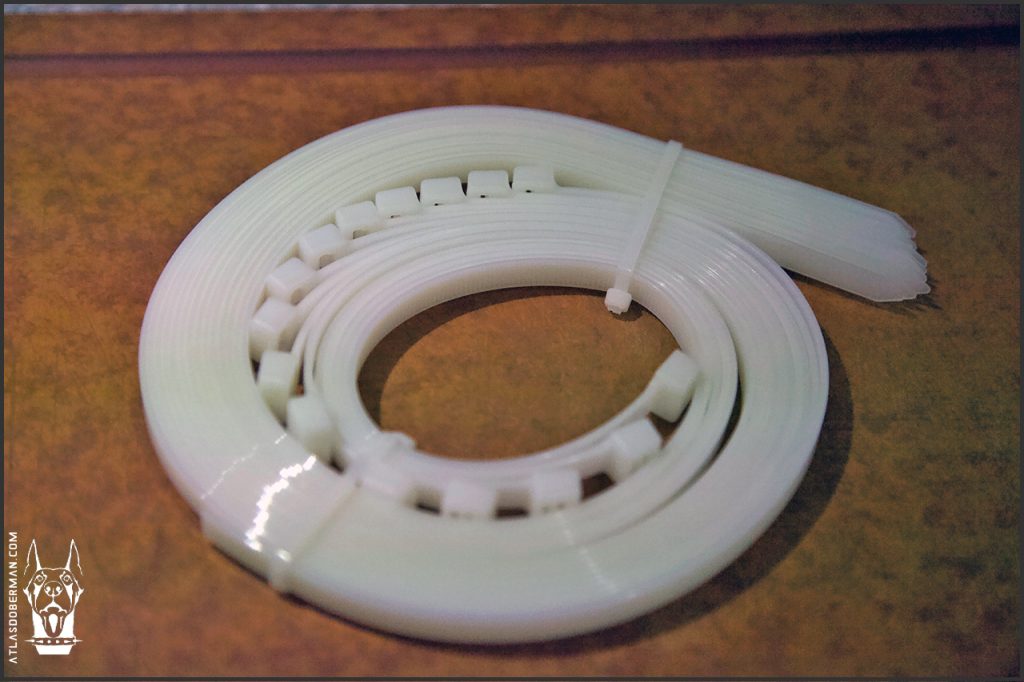
- Heavy duty nylon cable ties
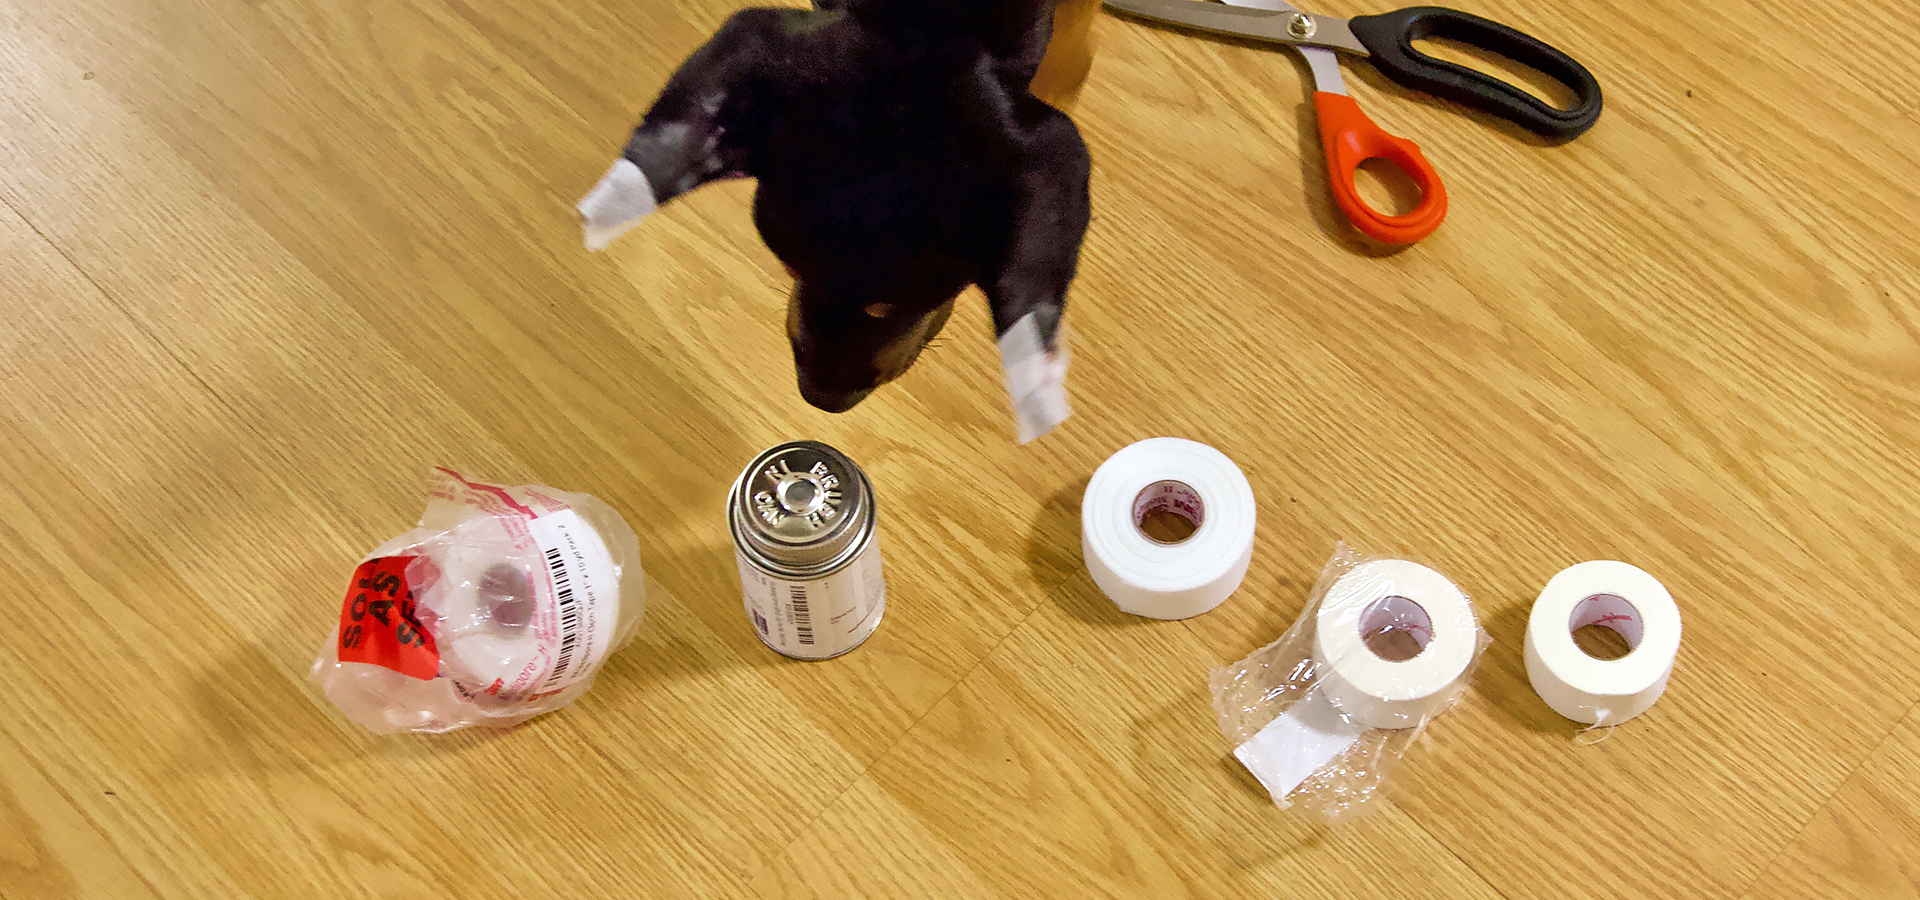
- Heavy duty scissors
- Torbot bonding cement
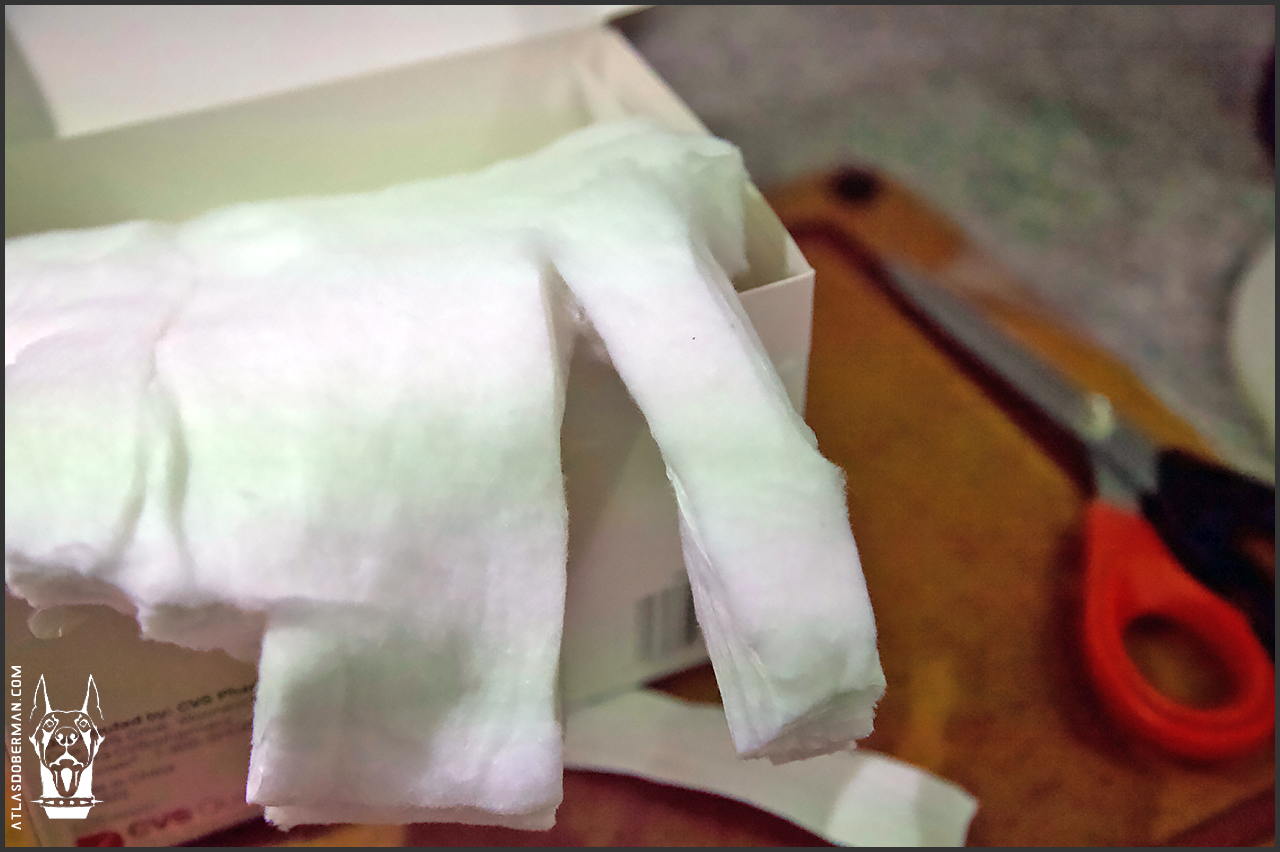
- Cotton roll, tearable
- Porous Tape – 1″ Wide
- Cloth Tape – 1″ Wide
- Nasal strips (optional)
Tony over at West Coast Doberman posted Atlas’ ears just right before sending him off to us, allowing me the opportunity to watch the entire process and take notes.


While Tony offers ear posting services, which is convenient for local owners, it is not an option for owners who live hundreds of miles away. This guide aim to help those who want to post their Doberman puppy’s ear at the comfort of their own home but do not know where to start. Make sure you have all the materials listed above, you will need all of them in one sitting to do a successful posting.
I am not going to lie, this guide is based on my very first attempt at posting a puppy’s cropped ears. In fact, I was so terrified of doing it that I had Atlas’ original posts on for two full weeks before attempting! In the end, it was pretty simple and once you get it down, the subsequent postings will be easy.


Practice makes perfect! Remember, I had absolutely no prior ear posting knowledge before we acquired Atlas. I learned how to post Atlas’ ears strictly by watching our breeder do it and taking notes.
How to Post Your Doberman Puppy’s Medium-Cropped Ears
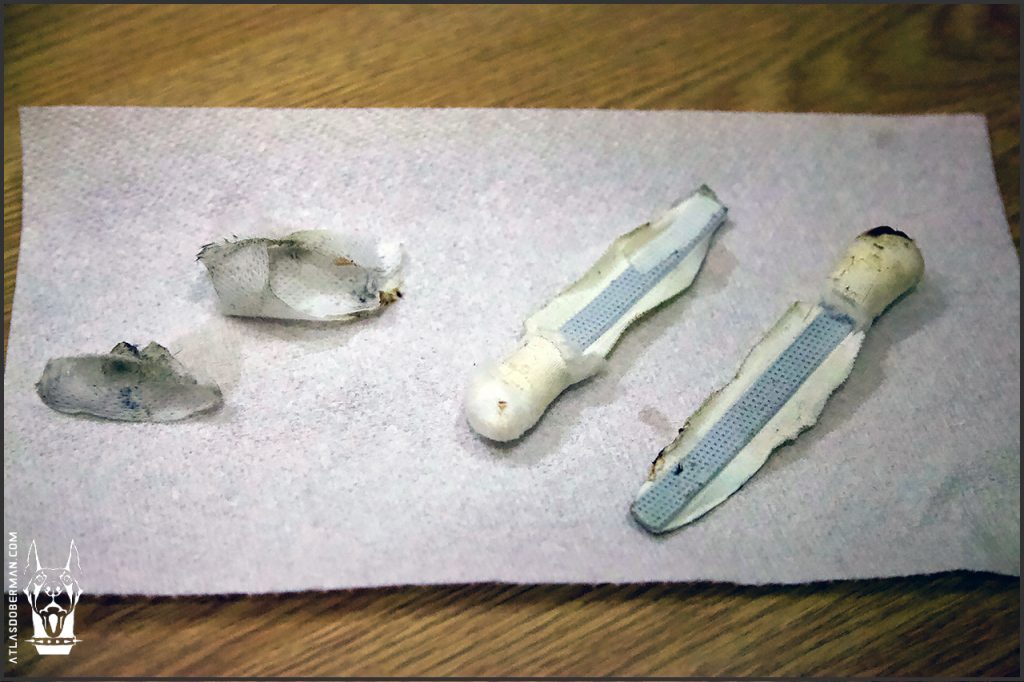
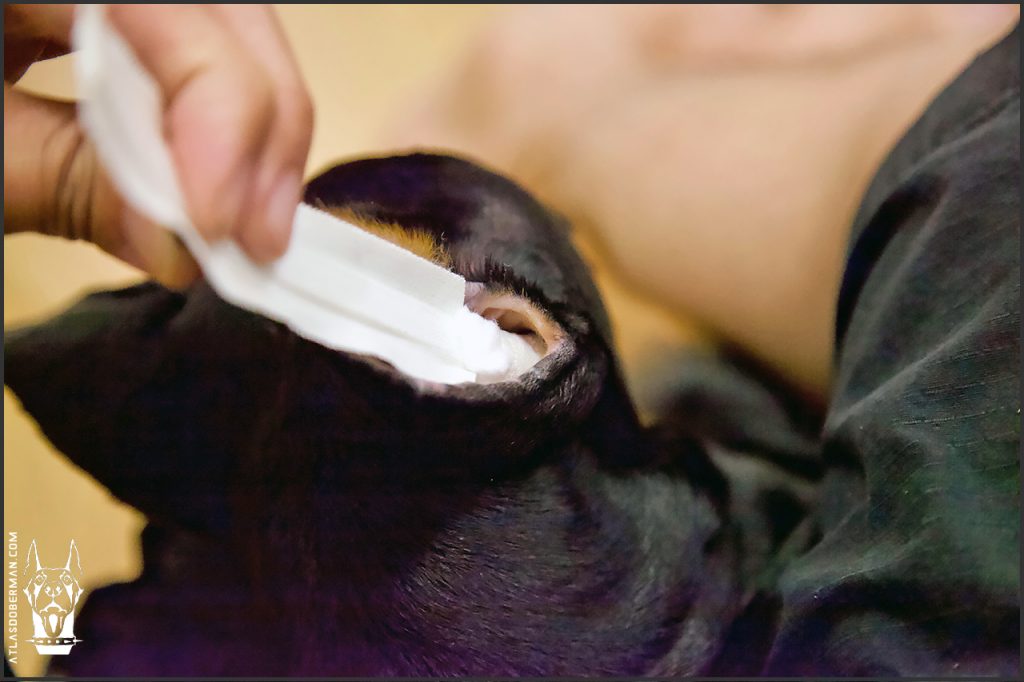
To start, remove the existing posts from your puppy’s ears. If bonding cement is present, use isopropyl alcohol to help remove stubborn residual adhesive. Carefully peel each ear off the post. Clean your puppy’s ears with cotton balls soaked with isopropyl alcohol and remove any remaining residue left from the previous posts.
Your puppy’s cropped ears will have dissolvable sutures, which is prone to infection if not cared after. Copiously spray Vetericyn+ along the stitches and allow the ears to dry completely before posting.
Step 1
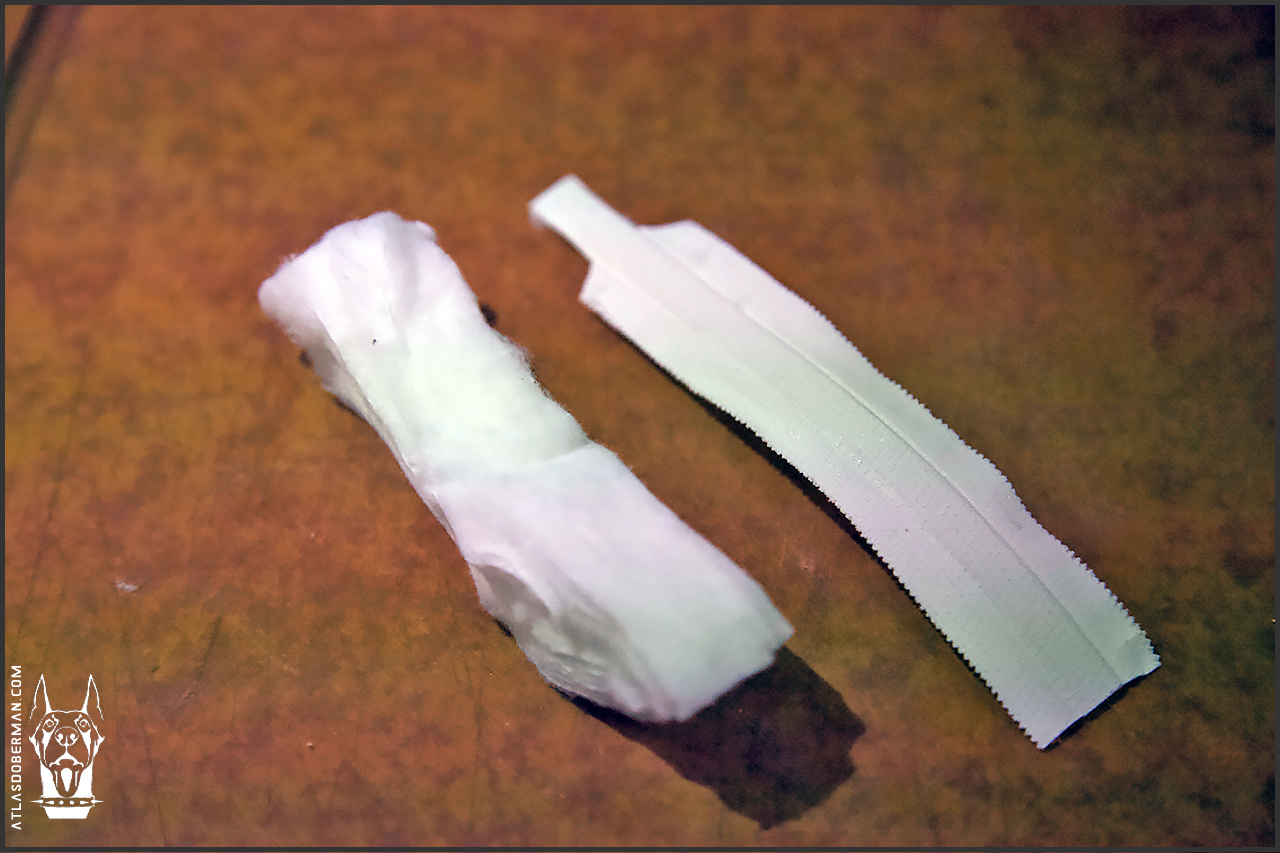
Take one nylon cable tie and work on one ear at a time. A single 14″ long tie provides posting for both ears. Make sure that you acquire stiff nylon cable ties that are between ¼” to ½” (about 1 cm) wide, nothing narrower. They will act as main support posts for your puppy’s ears.
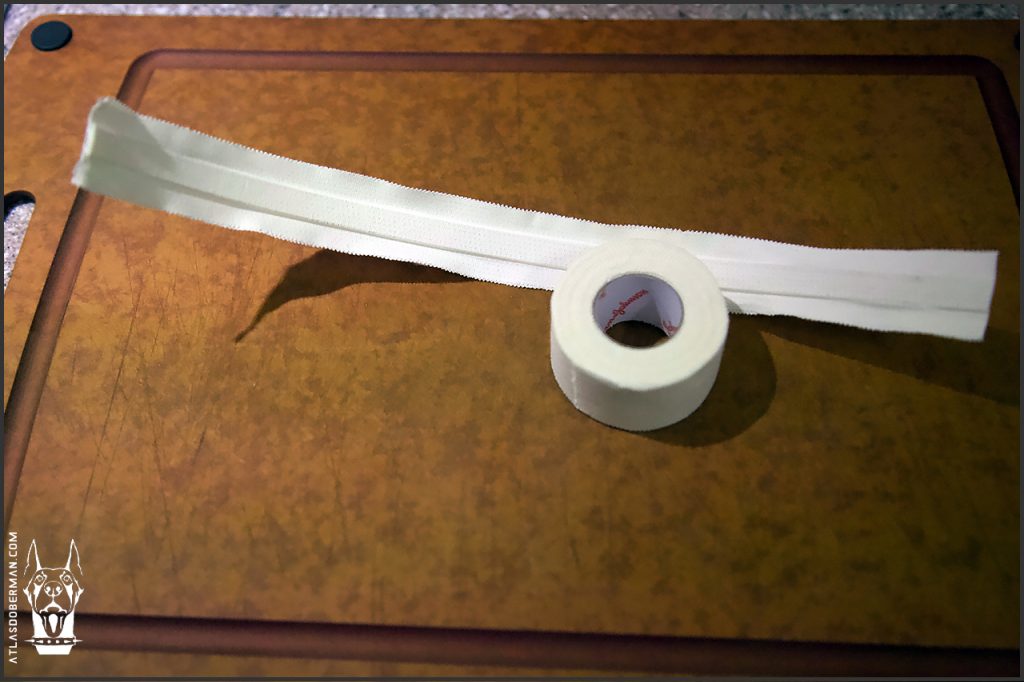
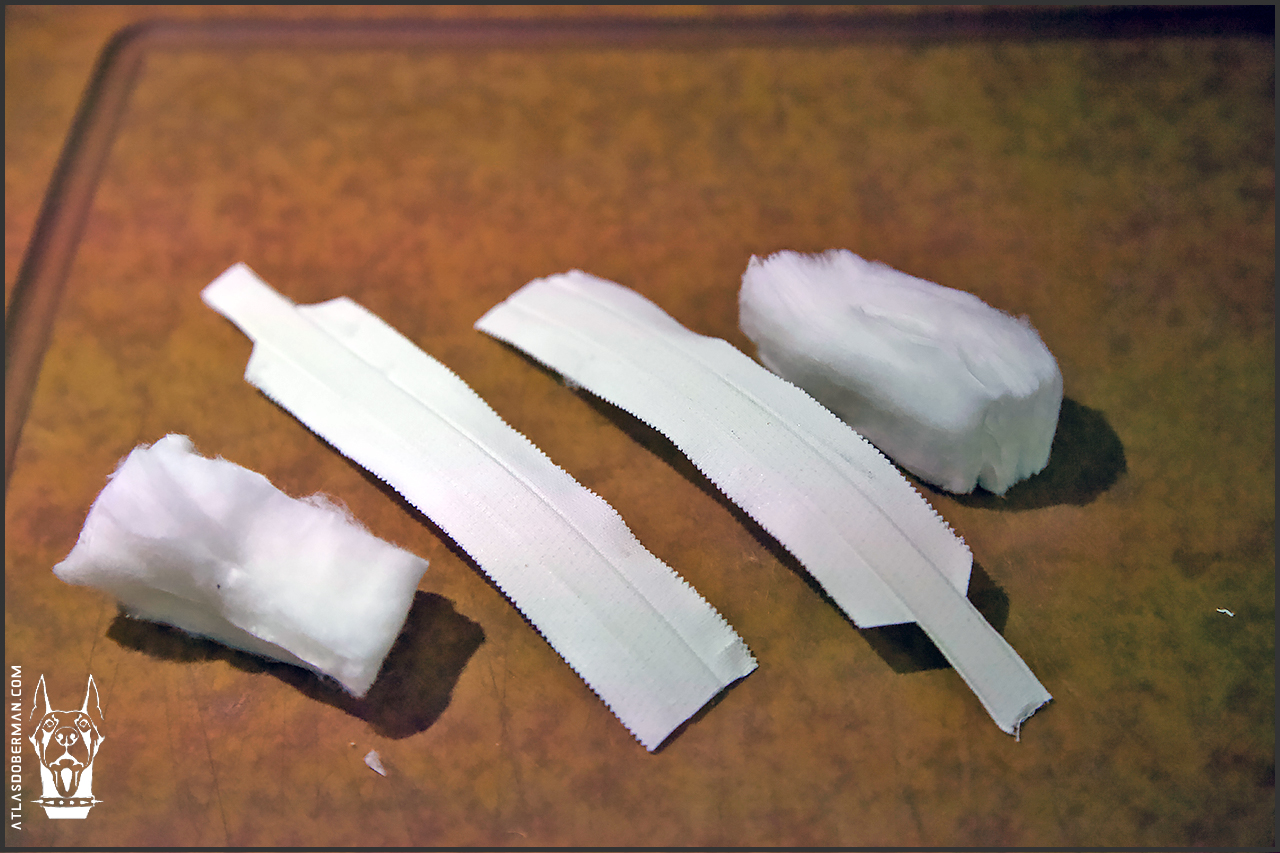
Trim off the end pieces so the tie is straight and uniform – remove the head and the tail. Next, take a 1″ wide cloth tape and completely wrap it against the nylon cable tie. Wrap the tape up and down so that it’s parallel with the tie. You’ll use about twice the length of the tie in amount of tape.
Step 2
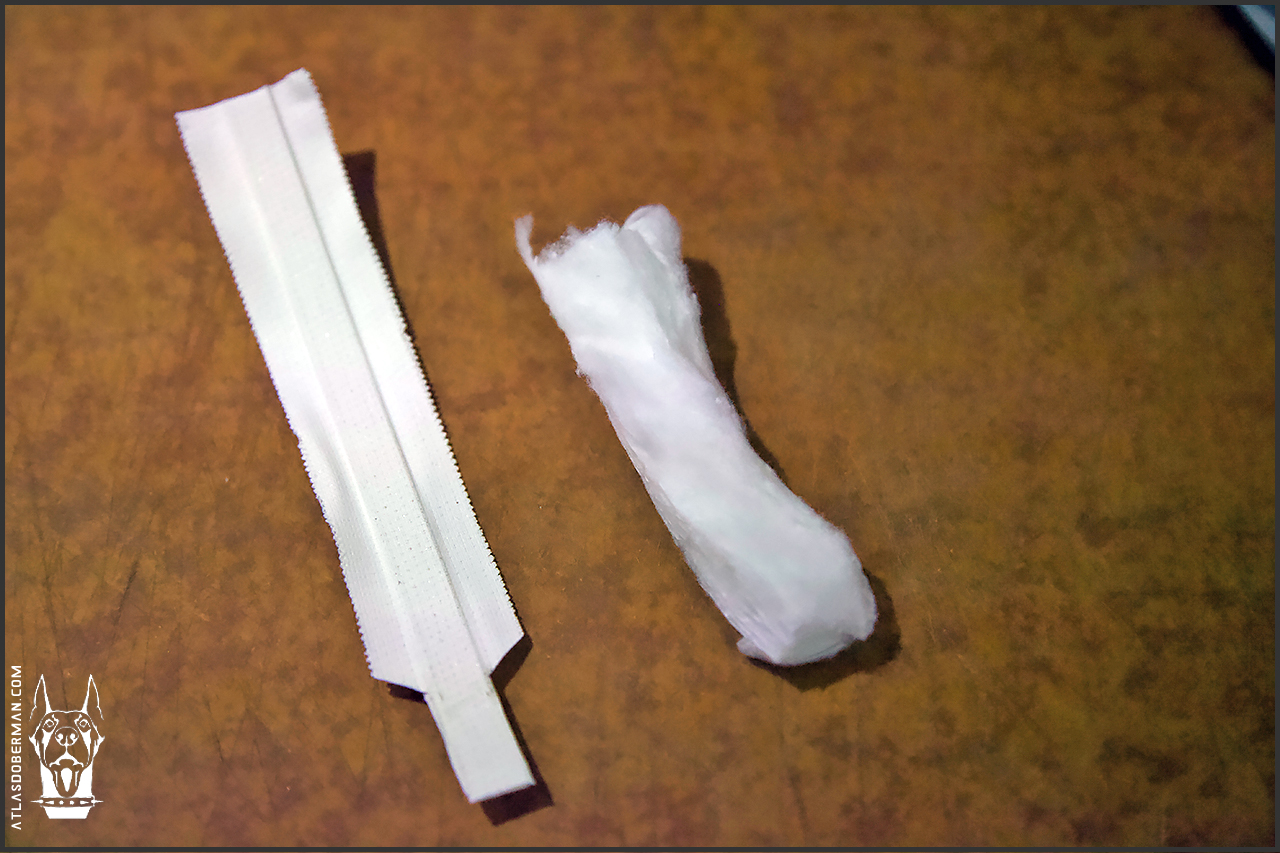
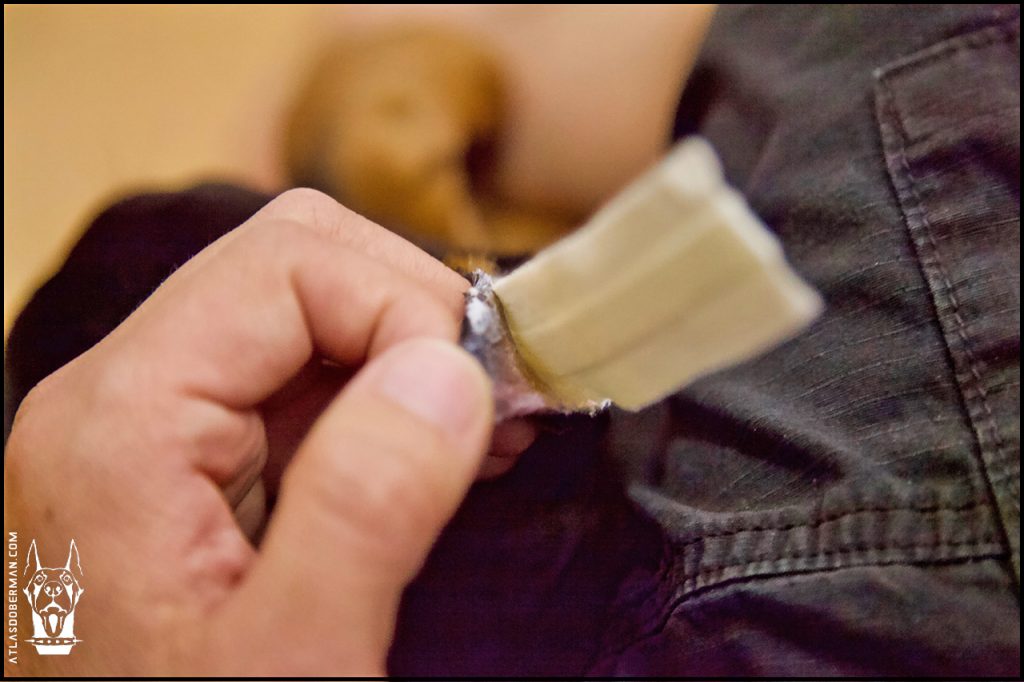
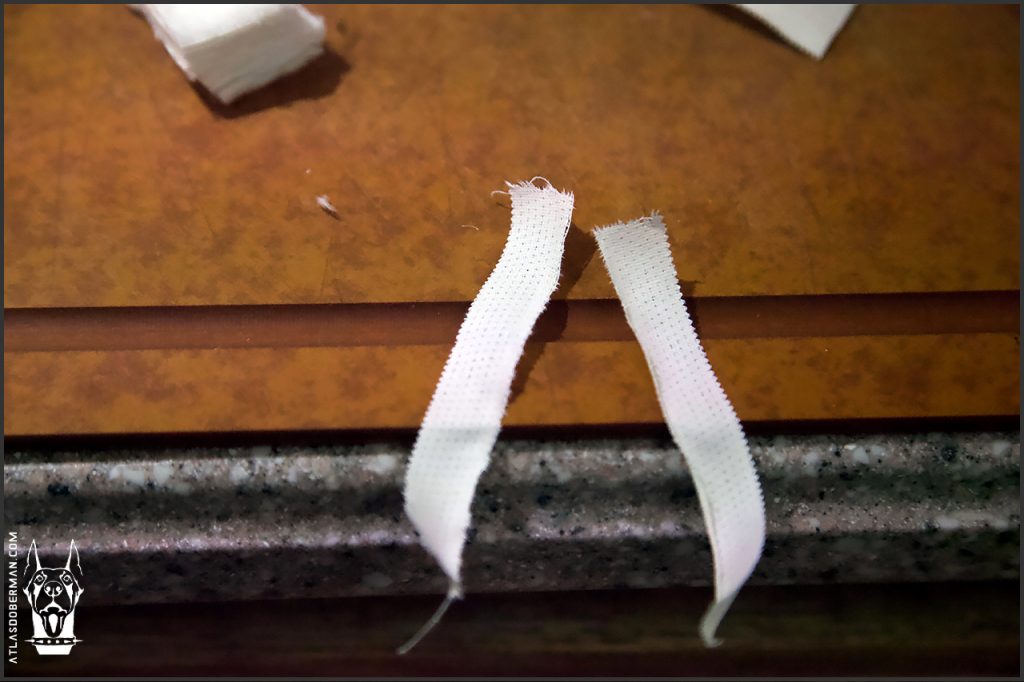
Next, trim off 1″ of tape from at each ends of the taped nylon tie, leaving a “notched pattern.”
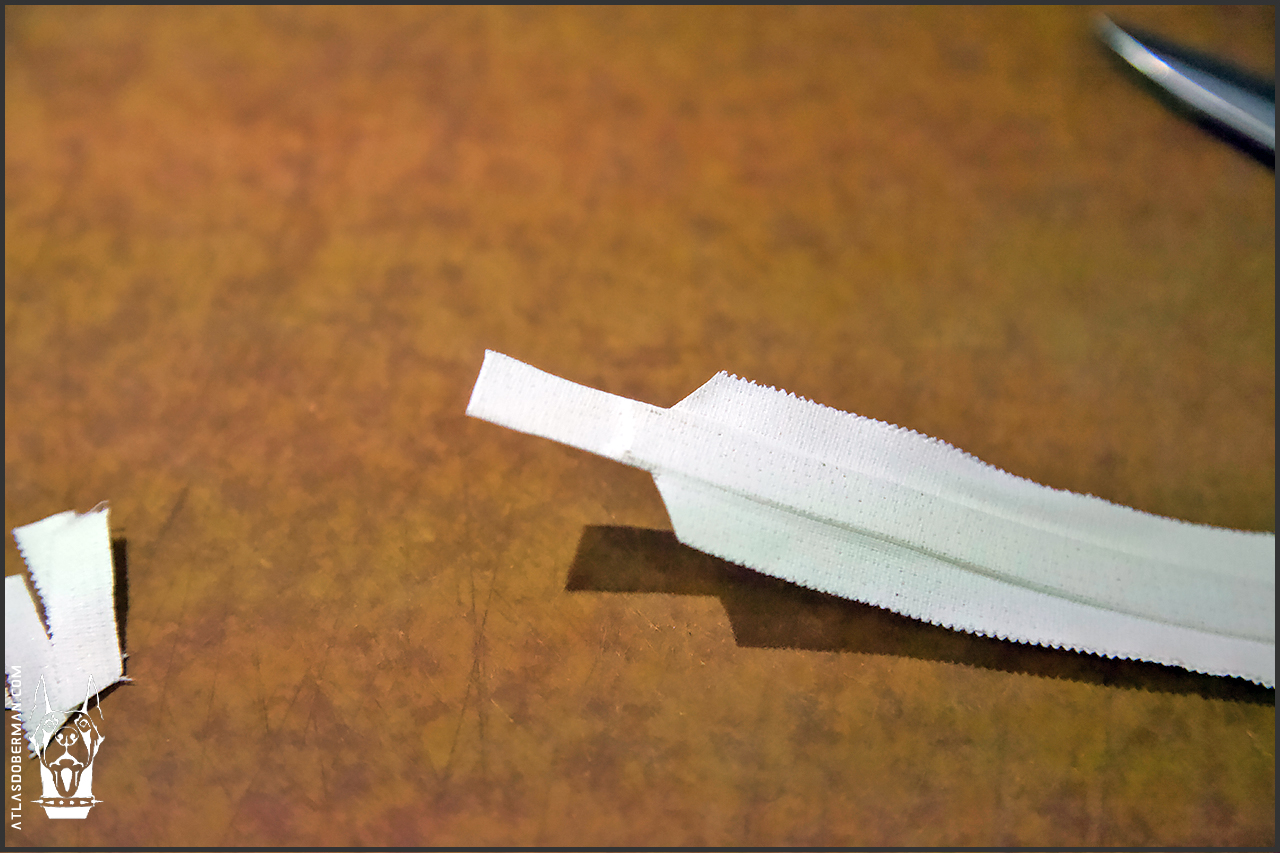
This notched area will act as the base of the posts in which you insert into your puppy’s ears.
Step 3
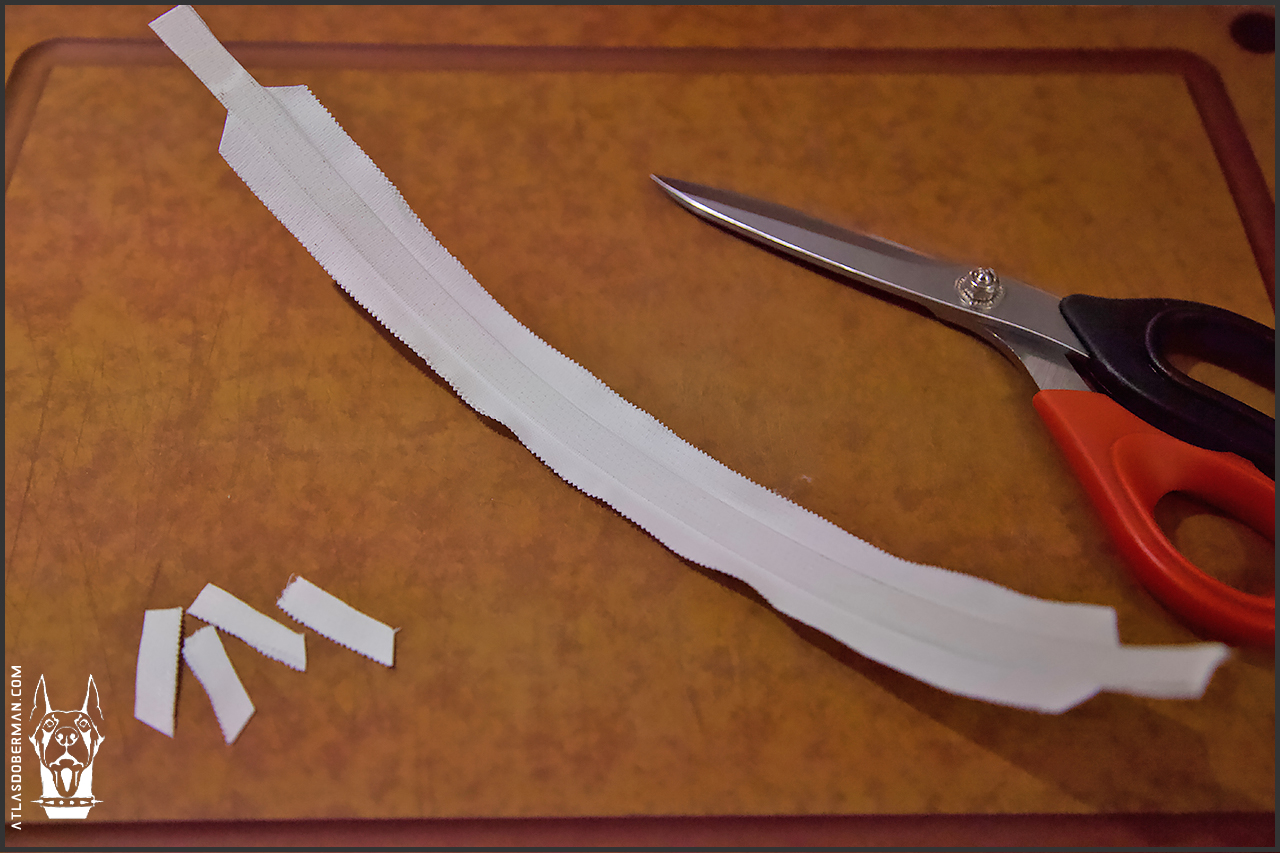
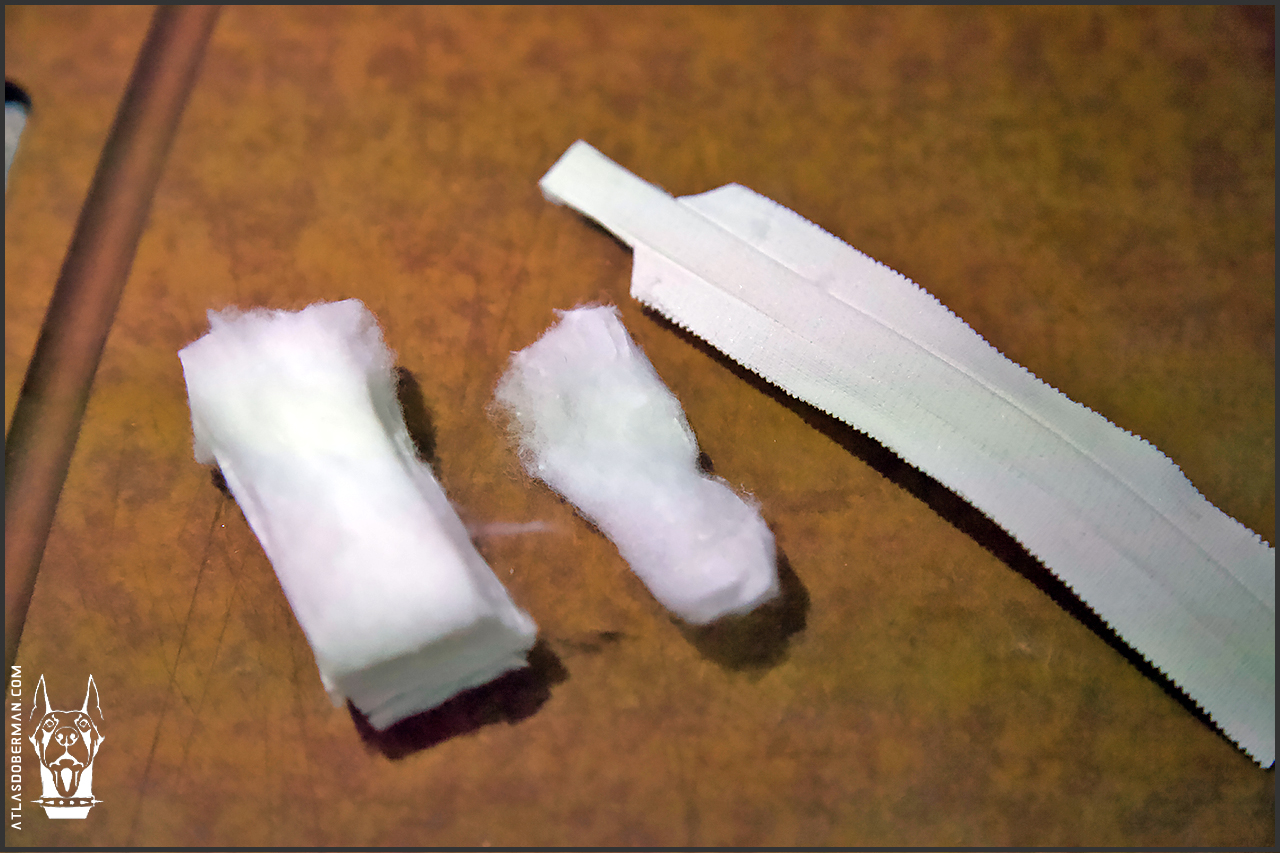
Cut the taped nylon cable tie in half with your heavy duty scissors, then shorten each tie halves to about the length of your puppy’s ears, leaving an extra 1″.
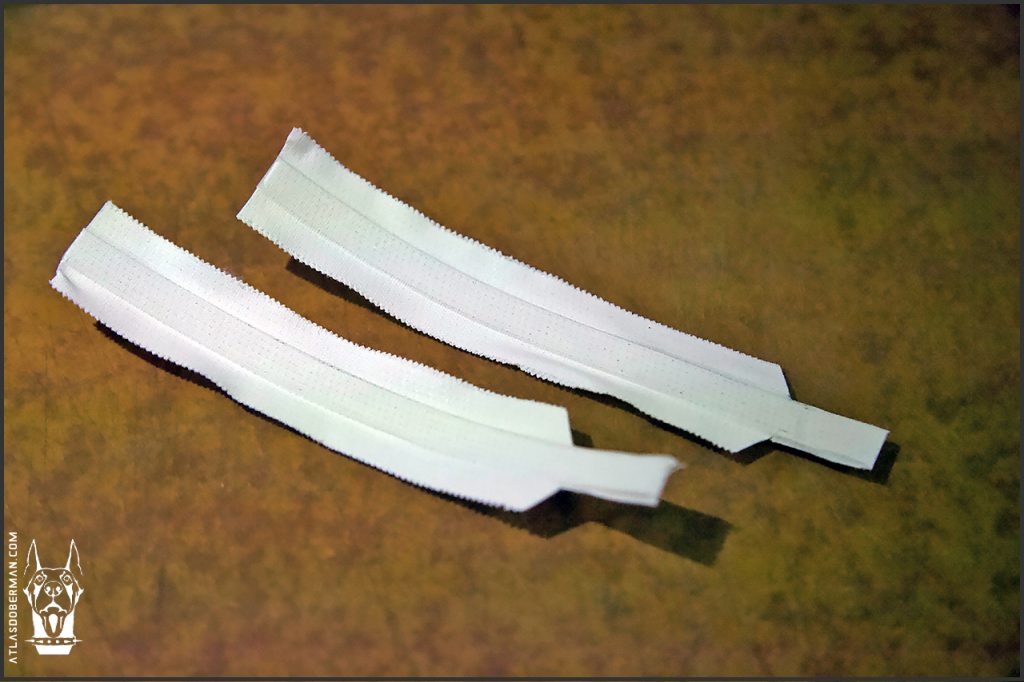
To get the correct measurement, take one half taped nylon cable tie and place it directly into the base of your puppy’s ear and measure at least 1″ past the tip of your puppy’s ear. Snip off the rest. Repeat with the remaining nylon tie half. These nylon ties are now ear posts.
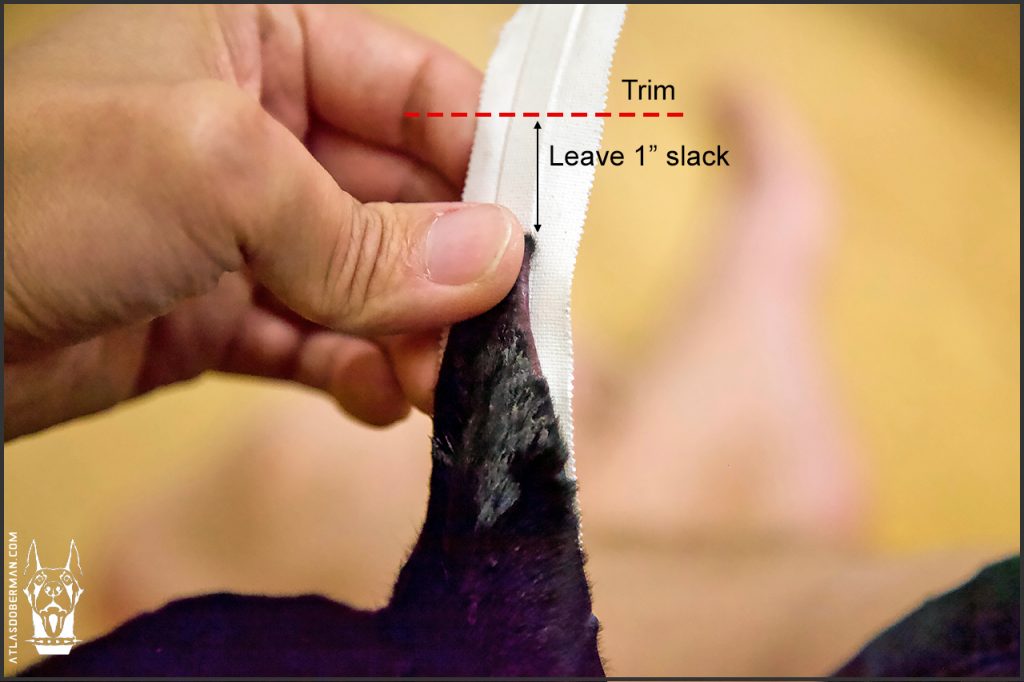
You want to leave the extra 1″ slack on the taped nylon tie so you can stretch and pull your puppy’s ears until it is taut against the taped nylon tie. Any prolonged slack on the ears during posting may result in a kinked or floppy ear!
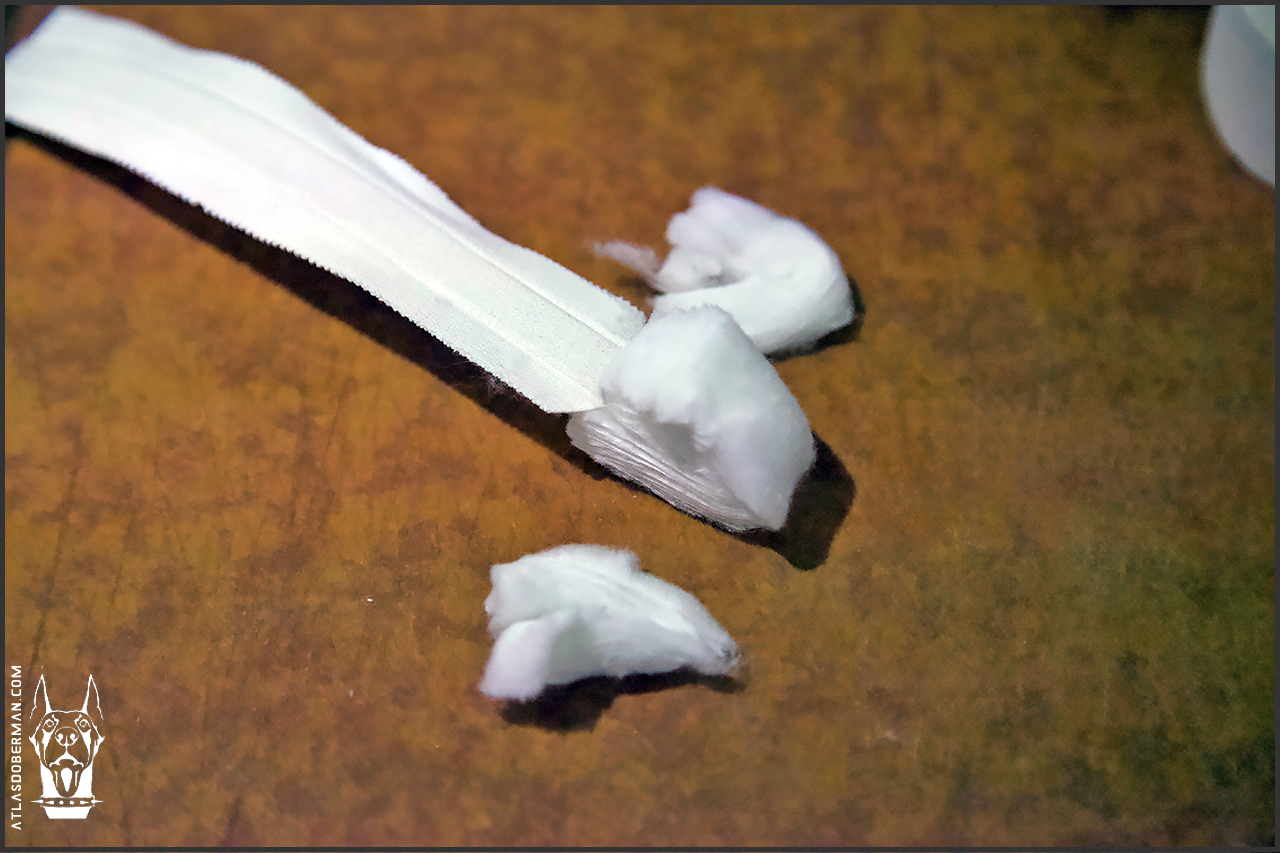
Step 4
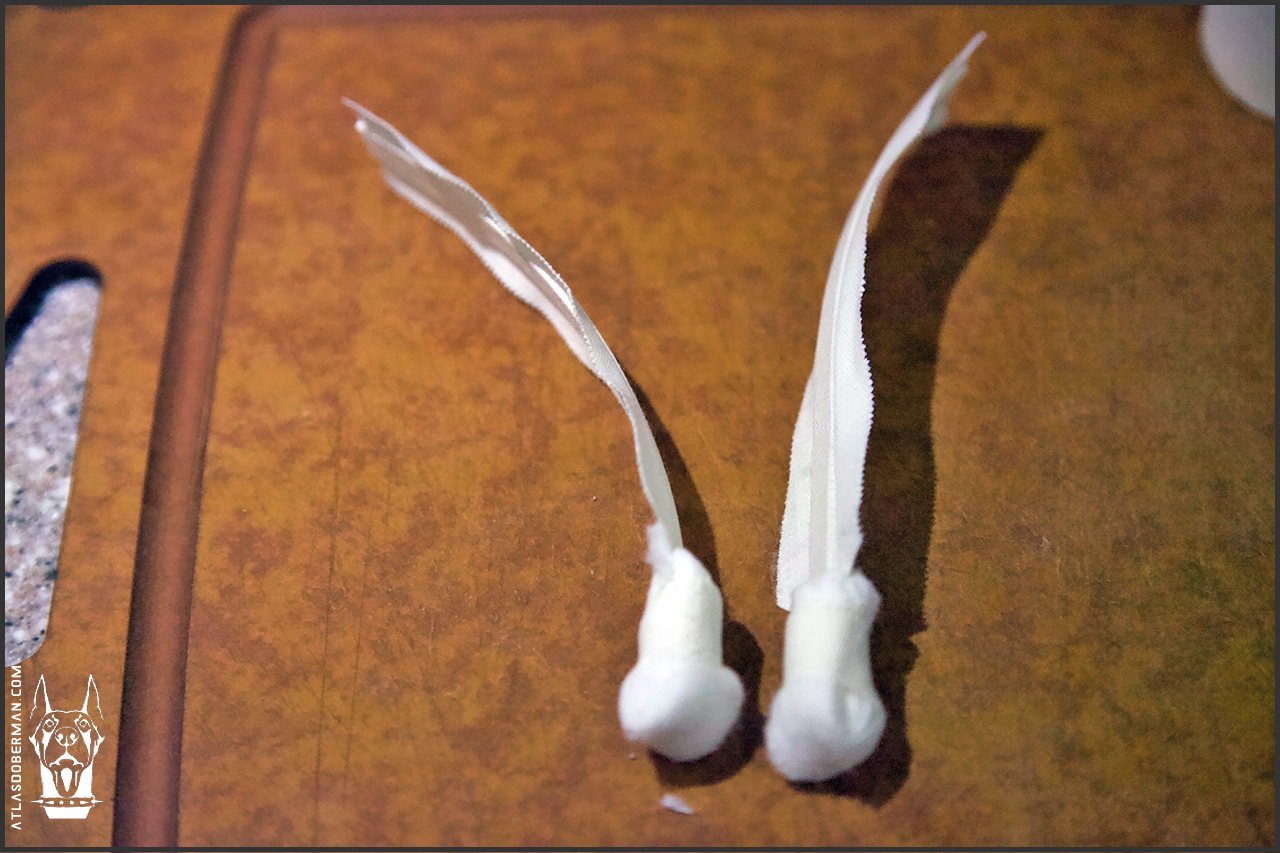
Wrap the notch on the base of each cable tie with a strip of cotton roll. You want just enough cotton just to fill the cavity of your puppy’s ears. If the cotton roll strip is too thick, peel off layers until it is manageable. Once you have the correct amount of cotton on, wrap a piece of porous tape around it to secure it onto the notched end of each ear posts.

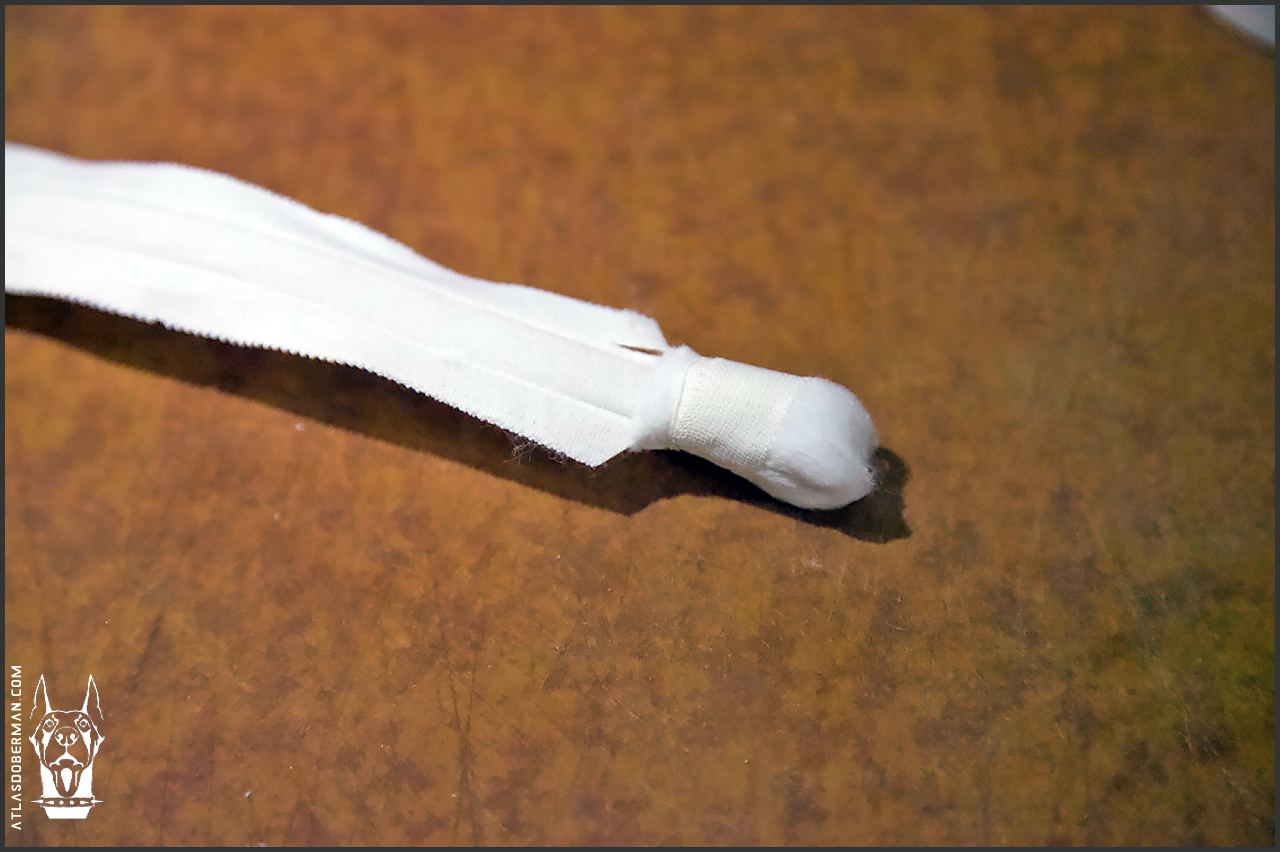
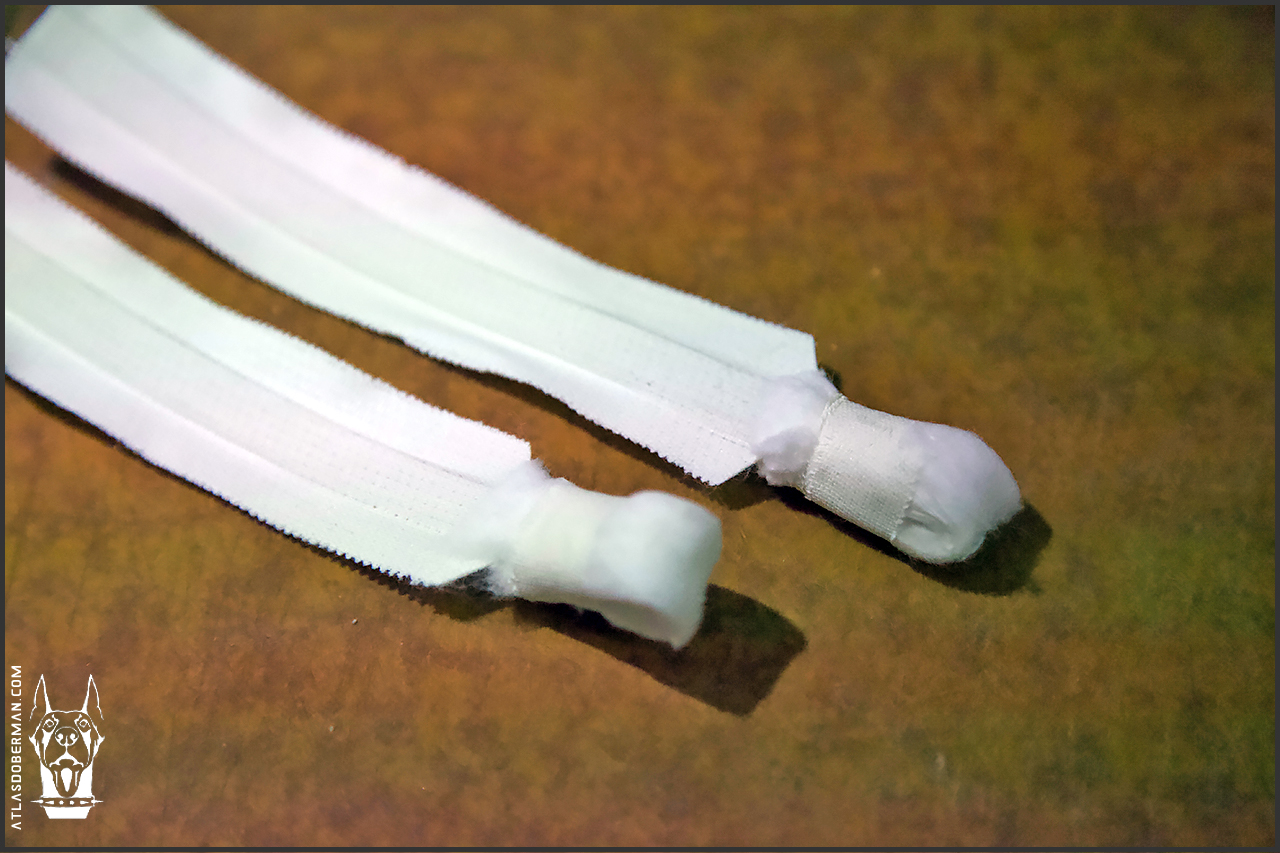
Step 5
Apply a generous amount of Torbot bonding cement along the convex side of the ear posts and completely cover the surface area of the tape past the cotton with cement.
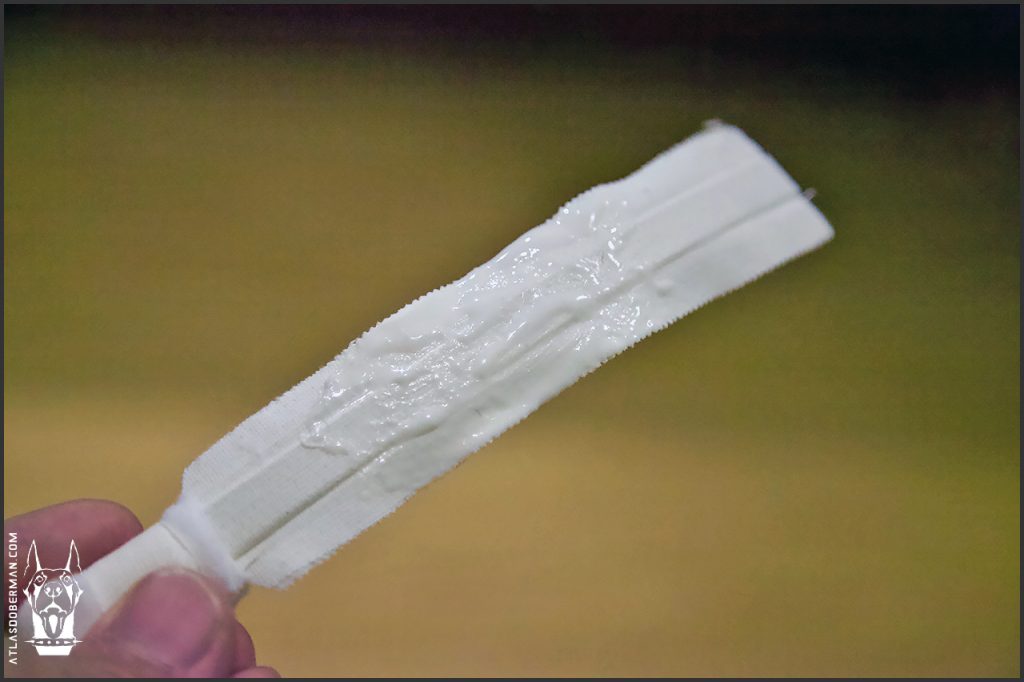
The convex bonded side will naturally adhere to your puppy’s inner ears (the side without hair).
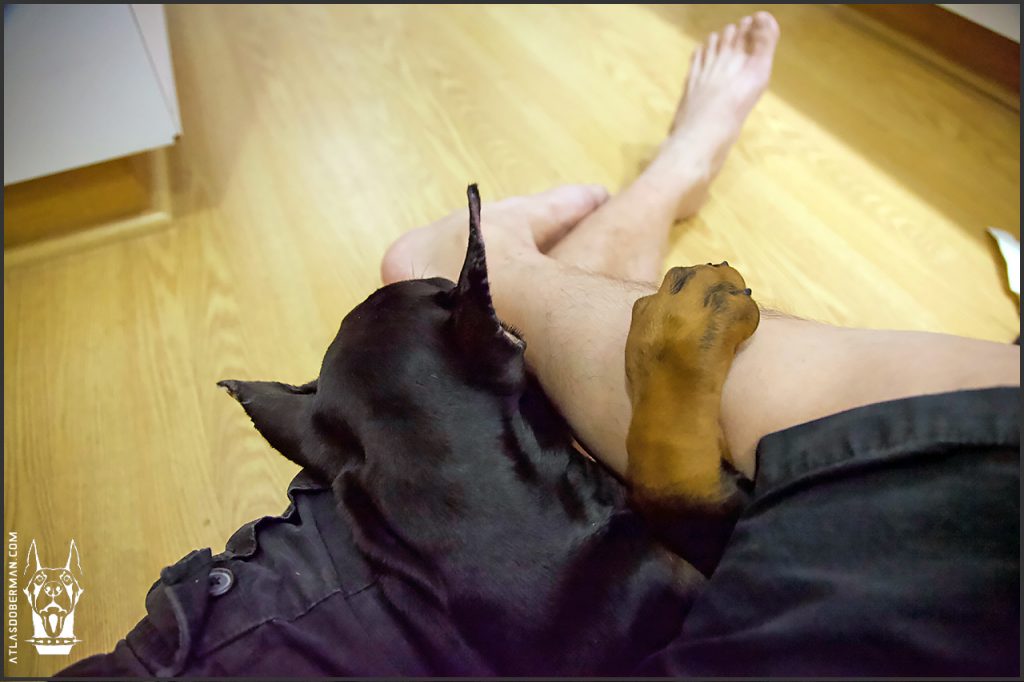
Step 6
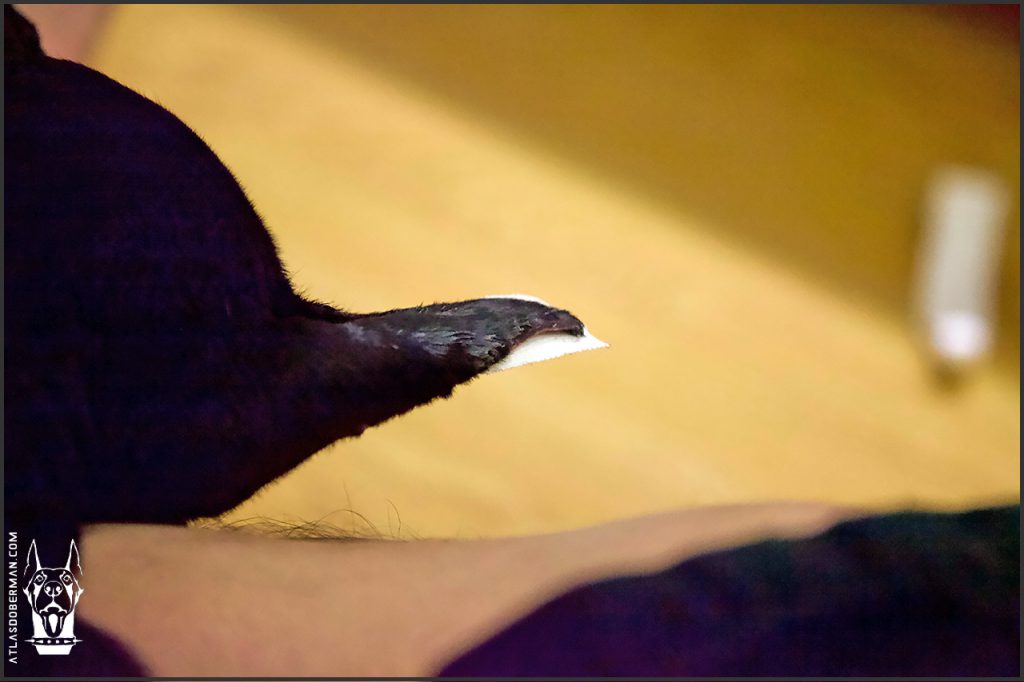
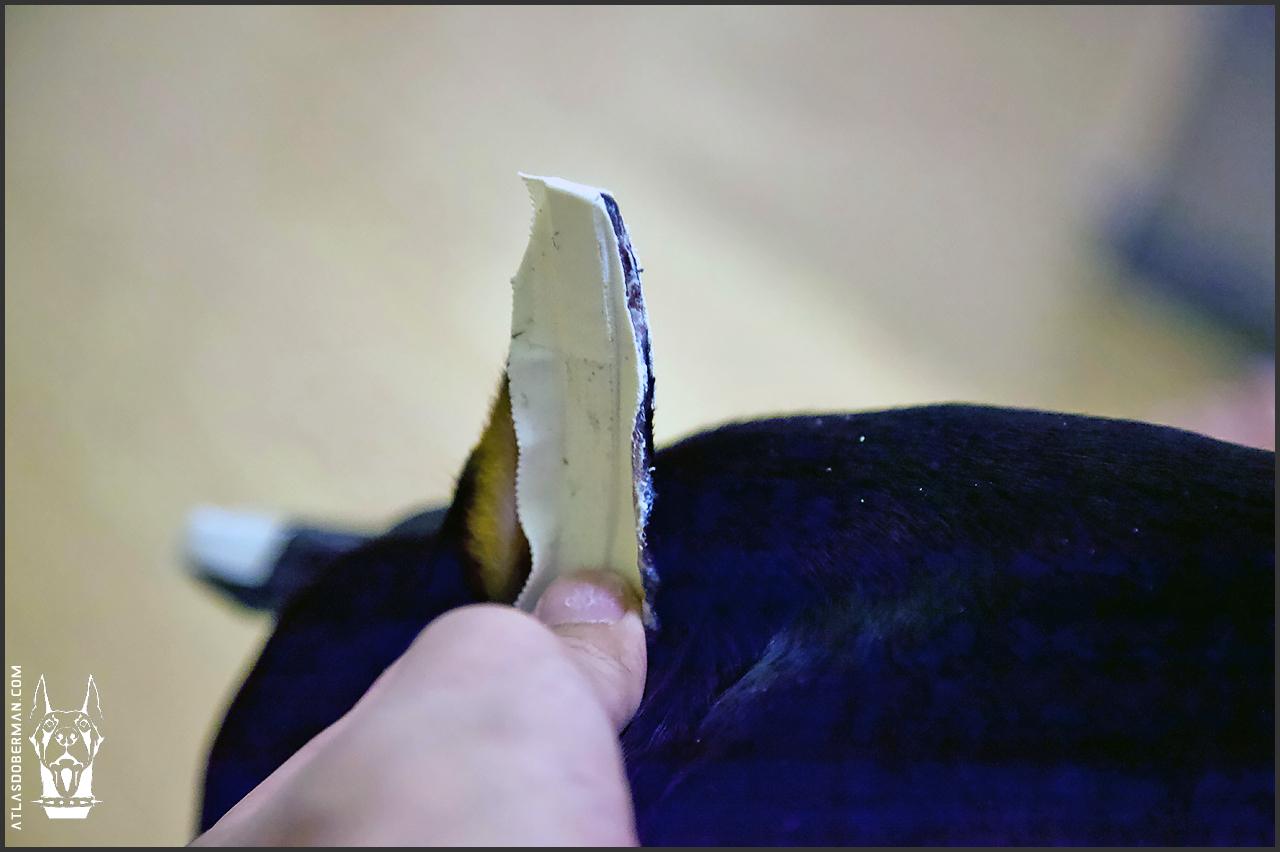
You’ll need to pin down your Doberman puppy securely to proceed. I find locking Atlas with one of my leg while in a Yoga sitting position helped tremendously. Insert the cotton end of each ear post into the base of your puppy’s ear and make sure it is as far down as possible. The posts shouldn’t move around once they are on. The fit should be snug, but not too tight. Pull and stretch your puppy’s ear upward as you press it against the bonded side of the nylon cable tie. Remember, the ears must be taut on the posts!
Hold for about 1 minute for the bond to set.
Step 7
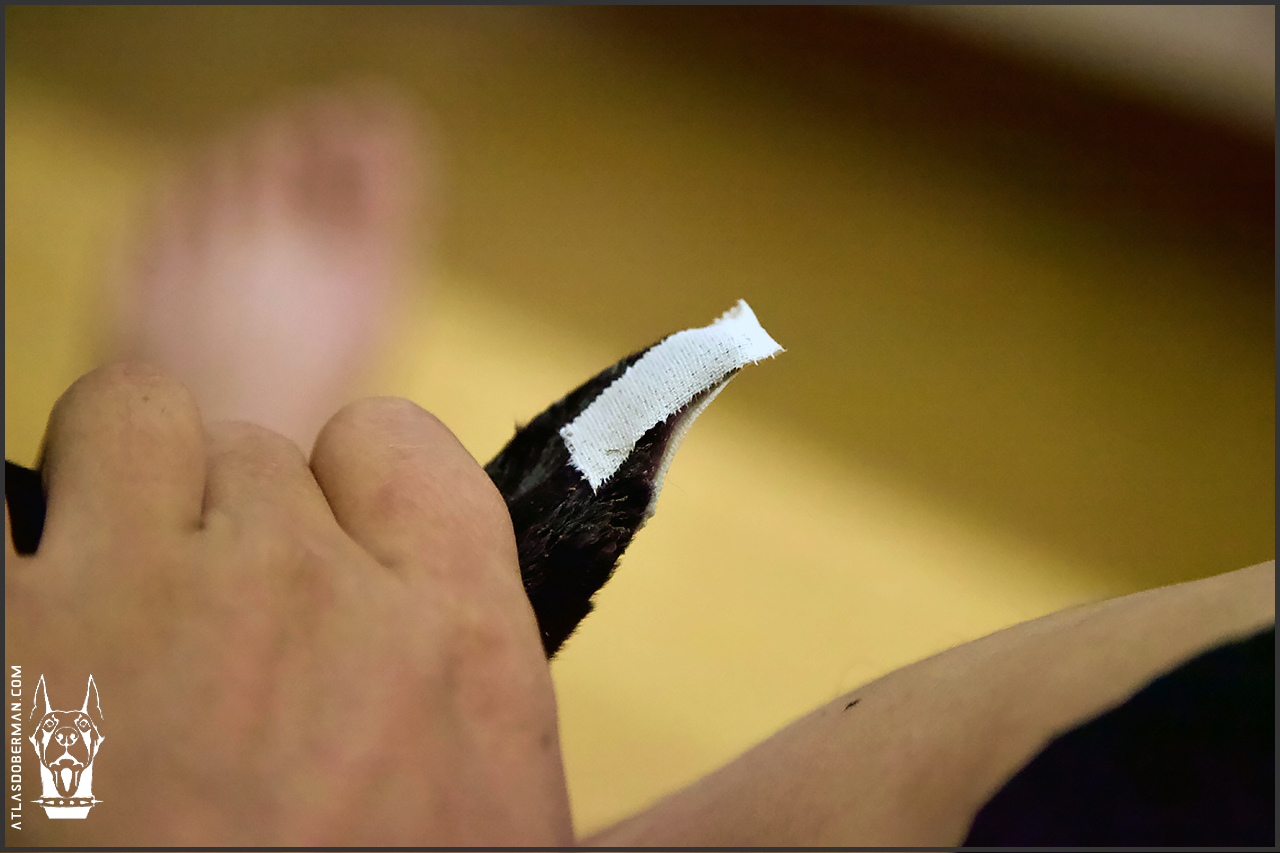
Carefully trim off any excess post from the tip of the ear.
You can optionally further trim the tip of the post so that it conforms to the shape of your puppy’s ear tips.
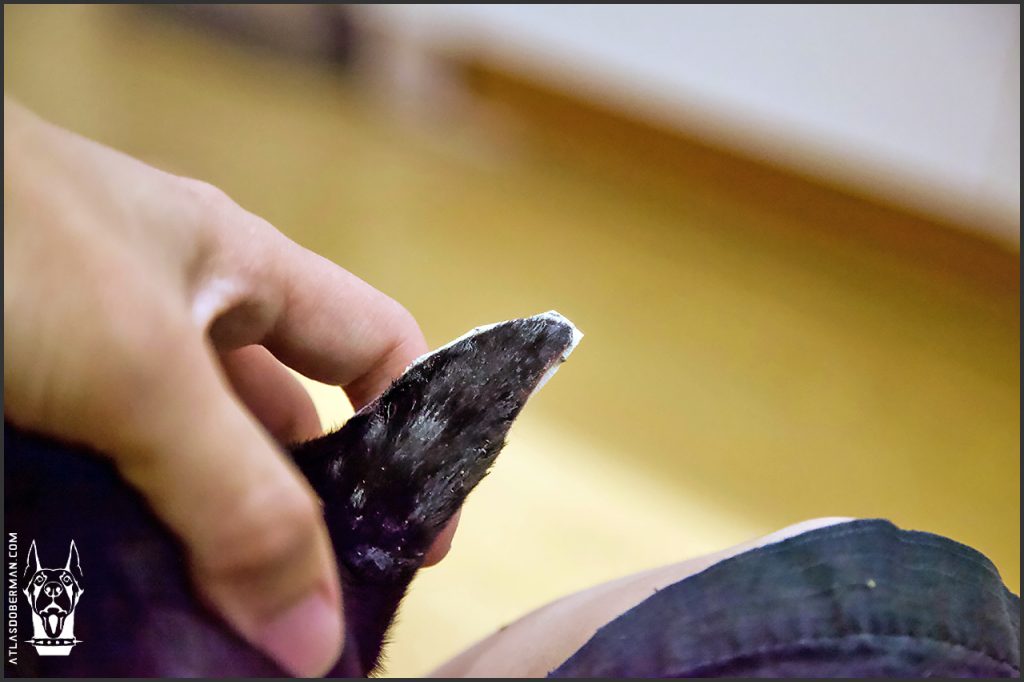
Next, take 2″ of porous tape and tape the tip of the ear onto the trimmed post. This tape will keep the tip of the ear from peeling off the post and curling backwards.


Congratulations! You just learned how to post your Doberman puppy’s ears! Now, repeat the exact same steps for the second ear.
How Often Should I Replace The Ear Posts?
Do not keep the same ear posts on for more than a week! Remember, as the stitches heal, it must say clean, remain dry and have disinfectant applied. If at any time you see your puppy’s ear oozing with blood or puss along the sutures, wipe it off with a paper towel and immediately apply Vetericyn+. Continue applying Vetericyn+ several times throughout the day. For serious infection consult a vet immediately.
How Long Do I Need to Keep Posting?
This really depends on your puppy’s ears and each puppy differs from the next. As long as your puppy is eating well and stays healthy, you can gradually stop posting when your puppy reaches 16 weeks old, assuming you brought your puppy home at 8 weeks old. In other words, the ear posting continues for 8 weeks straight.
If there are times where your Doberman puppy’s ears aren’t on posts for a prolonged period of time, due to shortage or lack of materials, or other reasons, you will need to extend the posting period. Consider posting your puppy’s ears an additional two weeks, past the 16 week guideline, for each day of missed posting. Any deviation from this recommendation may result in permanently kinked ear(s) or floppy cropped ears!
How Do I Tell When My Doberman Puppy’s Ears Can Stand On Their Own?
After your puppy reached 16 weeks old, you can gradually remove the ear posts and maintain a watch and wait approach. That is, take the posts off and leave them off for 2 hours interval at a time. If the ears start to droop within the first 2 hour window, then it is too early to remove the ear posts. Put the ear posts back on and continue posting for an additional two weeks, then repeat.
If the ears stays erect on their own for 2 hours, add another 2 hours. Continue this approach until your puppy’s ears can maintain their own stance for 24 hours. Remember, the minute the ears droop, it is time to put the post back on. Don’t mistake ear drooping for your puppy being relaxed! Relaxed puppy ears will droop, but if you try to get your Doberman puppy’s attention by snapping your fingers or whistling, they should stand. If they don’t, you must continue posting the ears.
Medium cropped ears usually requires 16~21 weeks of ear posting, while long ear crops usually take 6 months and up to 9 months.
When Your Doberman Puppy’s Ears Begin to Stand On Their Own
When your Doberman puppy’s ears begin to stand on their own, you can optionally place stiff nasal strips at the tip of their ears to prevent the tip from curling backward. Snip off the “wings” on the nasal strip and apply bonding cement on one side. Place the bonded side of the nasal strip against the tip of your puppy’s ears on the inner side (without hair). Replace weekly and apply for one month. I personally did not have to do this with Atlas.